Under construction:
So you just got your first decent camera and now you’re overwhelmed by all the settings and options available to you. If you just want to go out and take some pictures before you know exactly what you are doing here are my suggested settings to start with. Camera settings for beginners. If you’re ready to start learning about your camera and what the various settings do here are some exercises for you to do:
Let’s start with Aperture. Set the control dial to “A” mode and turn the control wheel while watching the aperture change in the viewfinder. If you have a kit lens it will most likely by f3.5 at the widest angle of your lens and the widest aperture. You won’t see the changes if you look down the lens on your camera because it only closes down as you take the picture - to make it easier to see through the lens. If your camera has a “depth of field preview” button you will notice that when you press it “everything goes dark” if your aperture is set smaller than the widest it can go. That is because the camera closes the aperture to what you have set it at to show you how much of the image will look “in focus” when the picture is taken.
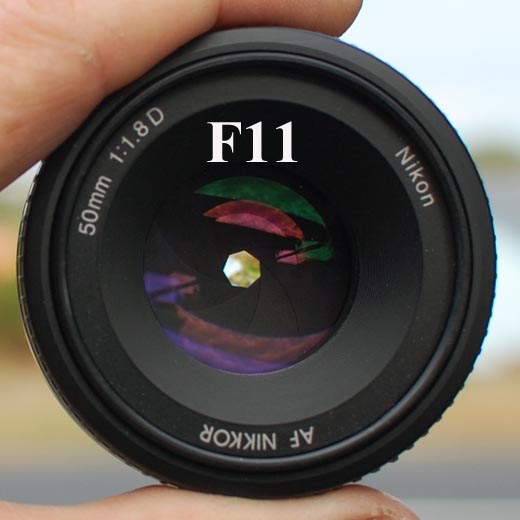
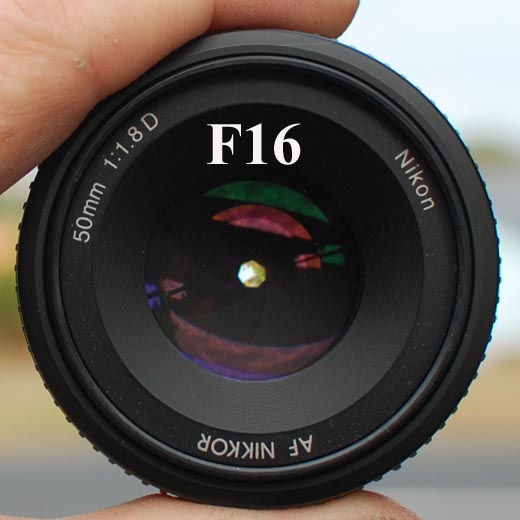
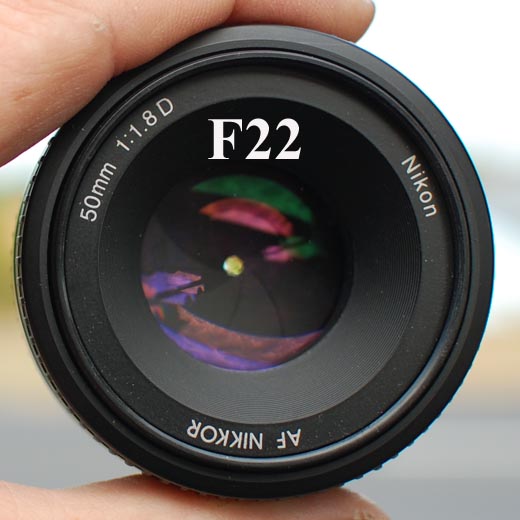
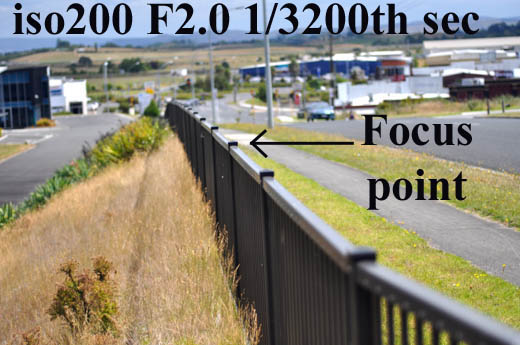
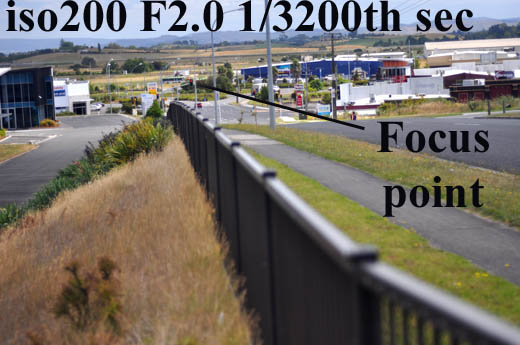
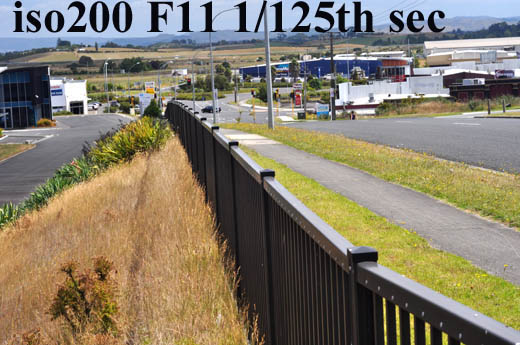
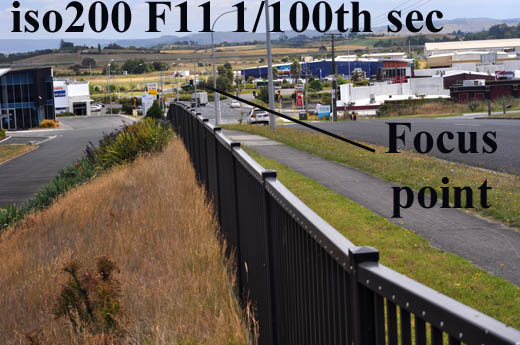
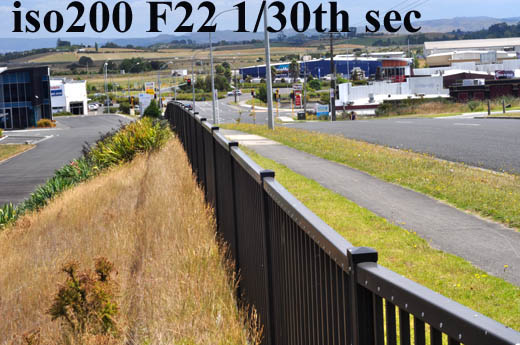
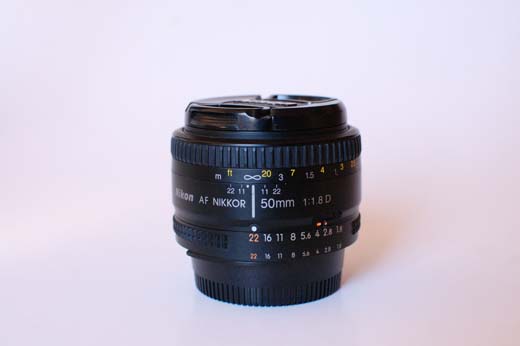
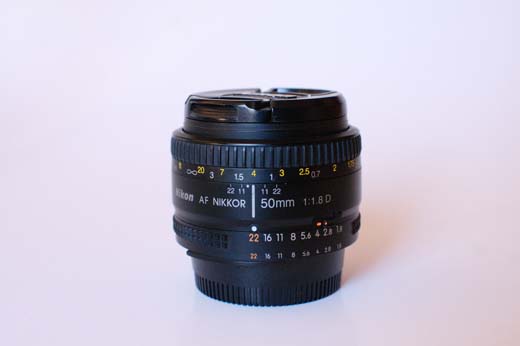
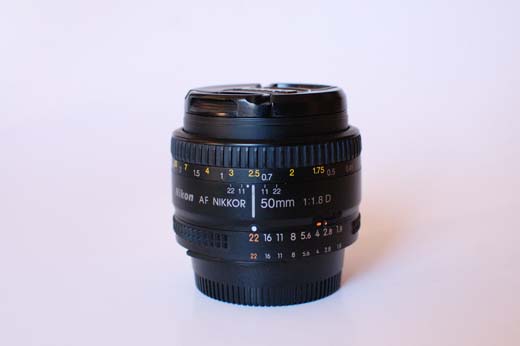
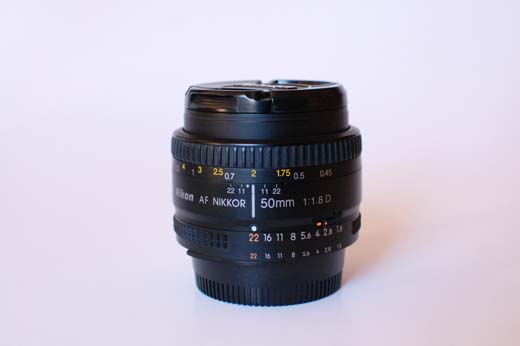
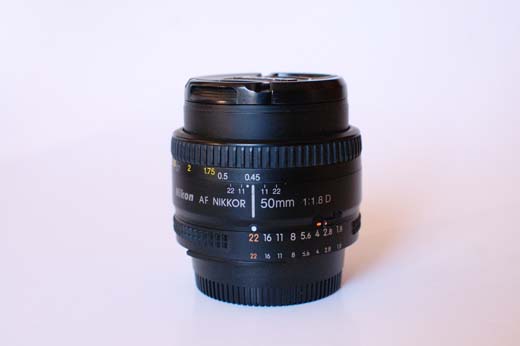
In the pictures below we have a 50mm f1.8 prime lens set at f2. As the aperture is changed manually you can see how the higher numbers restrict the amount of light coming in.
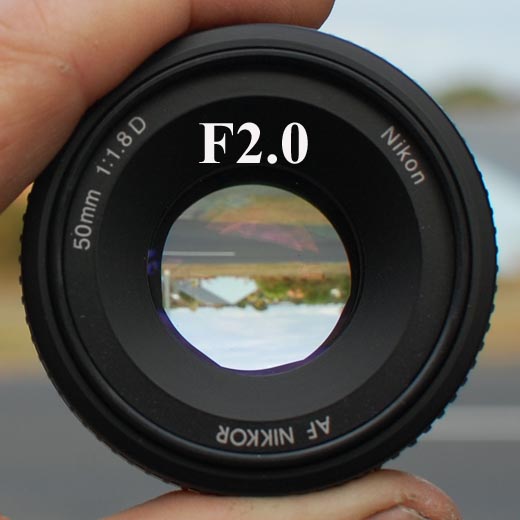
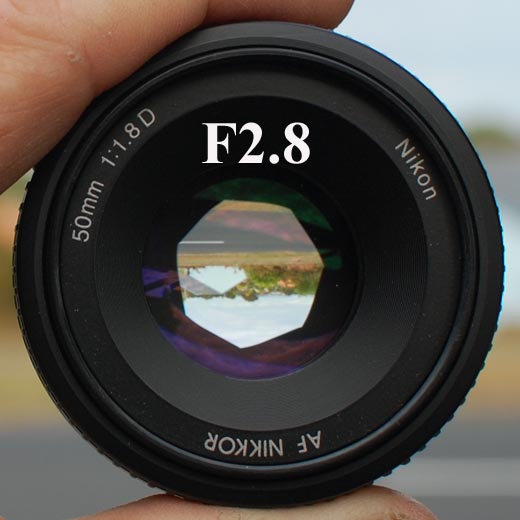
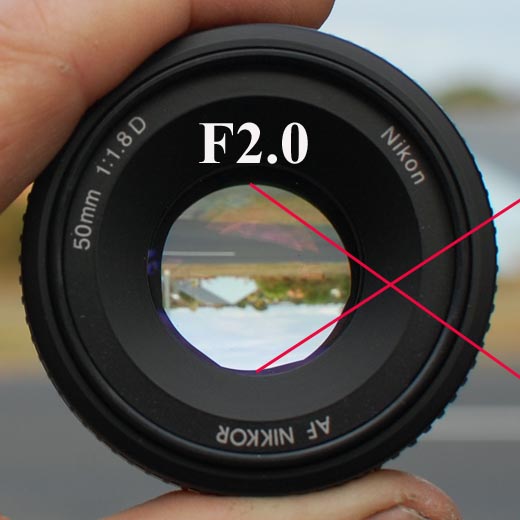

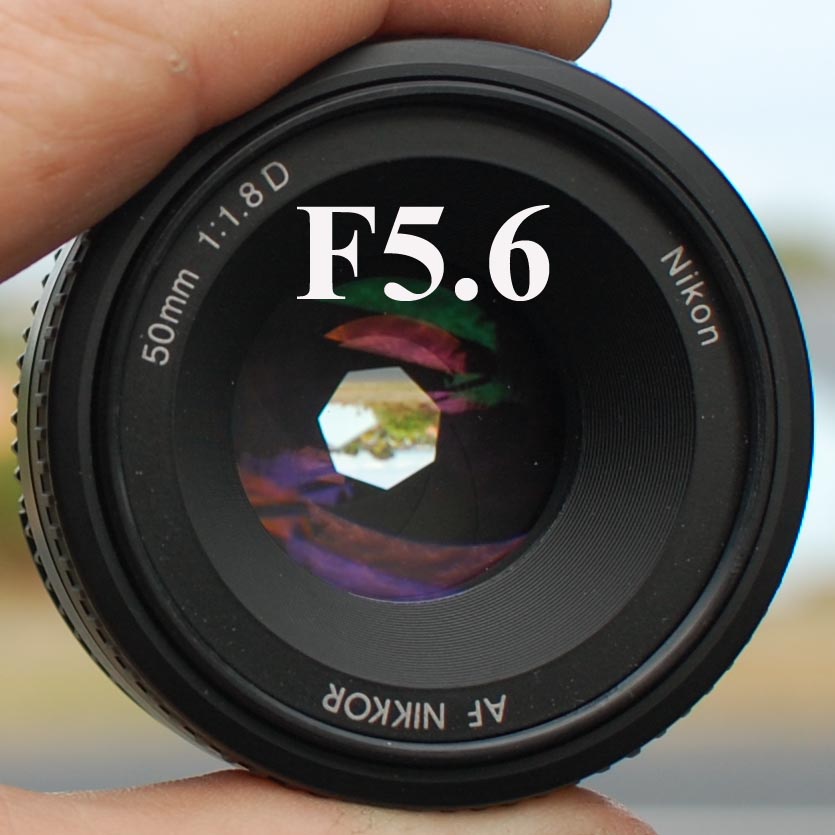
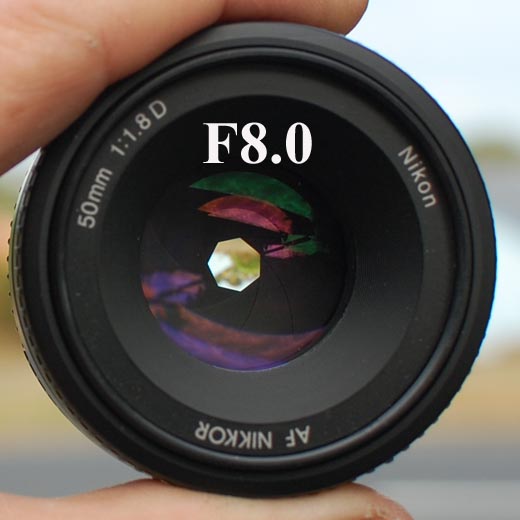

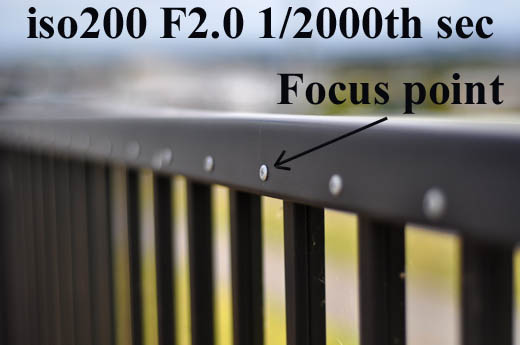
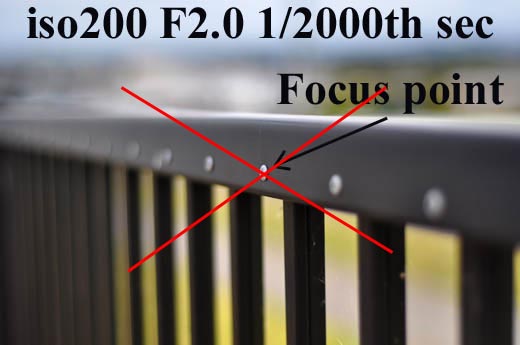
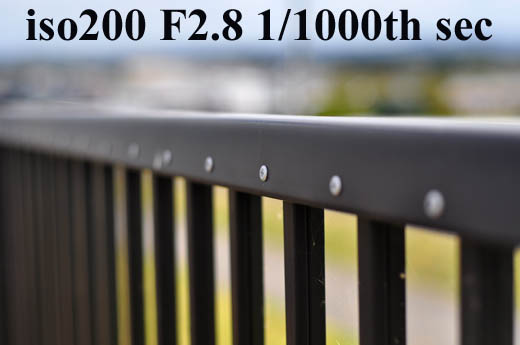
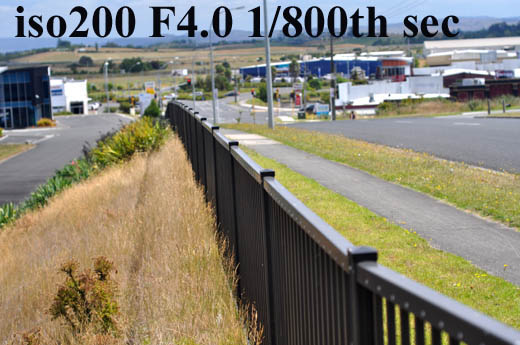
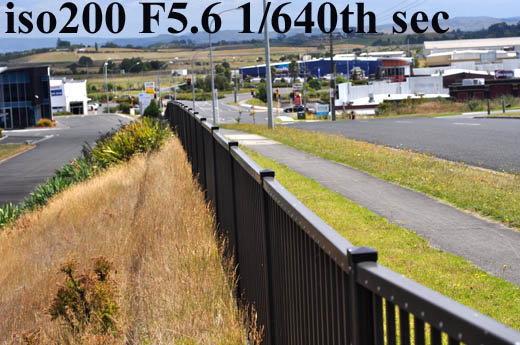
Set your camera to auto iso for now and and find a subject that can show a difference in depth of field, something like a fence. In my samples the iso stays at 200 but as the aperture changes and less light is being let in the shutter speed changes to compensate. if you can shoot at 1/2000th sec at f2 and change to f2.8 [1 stop “slower”, each “stop” being either twice as much light or half the light, depending which way you go.] the camera has to let the light in for twice as long - 1/1000th compared to 1/2000th. At f4 it chose 1/640th but should have been 1/500th to be precise - no camera meter is perfect and no camera gets it right every time, besides, it was a “patchy cloudy” day so there were slight variations in the light. At f5.6 we see 1/250th sec which is spot on - 1/4 the speed of 1/2000th because f5.6 is “two stops” darker than f2.8. If we’re cooking a meal [getting correct exposure] in our microwave then in this example f2 is full power which takes 1/2000th sec to “cook our meal”. If we go to f2.8 we have the microwave on half power and have to leave it on for 1/1000th sec to “cook our meal”.
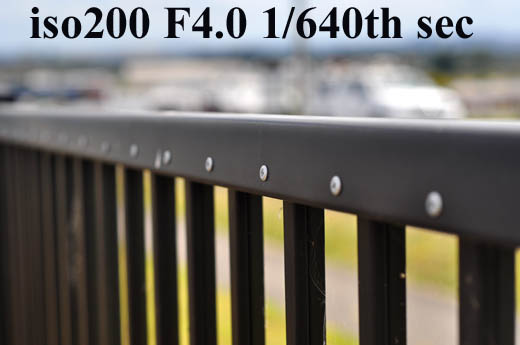
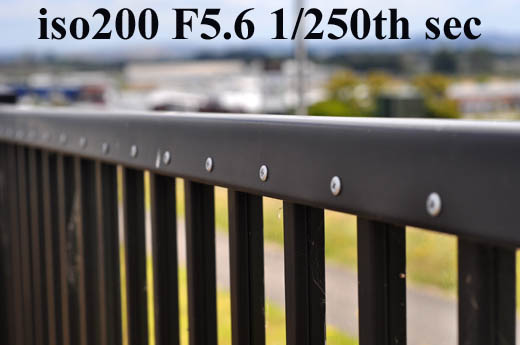
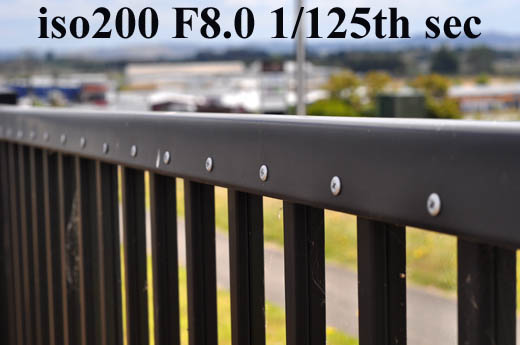


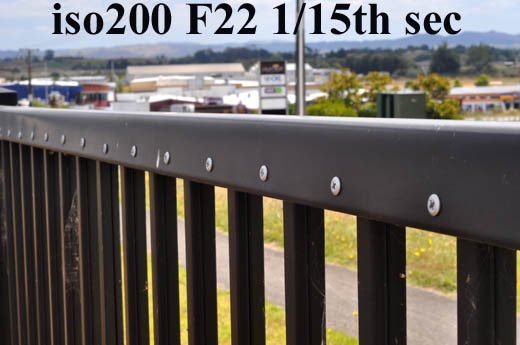

Apertures work like “squares” 1, 1.4, 2, 2.8, 4, 5.6, 8, 11, 16, 22. Every second number is doubled. “1, 2, 4, 8, 16….”, “1.4, 2.8, 5.6, 11, 22”. If we start from 1 then 1.4 squared is close to 2, twice the area. 2 squared = 4, twice the area of 1.4 squared. 2.8 Squared is almost 8, half the area of 4 squared [=16]. You don’t have to understand the maths when making adjustments, it’s just good to have an idea what the numbers mean, then you can forget about it and concentrate on making good photos.
Now take another set of photos at various apertures focused slightly further into the scene. You will notice that the depth of field still changes quite a bit but not as extreme as when you are focused closer. The lesson? If you want the background ‘more blurred’ get closer to your subject. Notice also the two images shot of the building in the distance - almost no difference between f2 and f16 - this will be explained below.


To understand the difference between the depth of field when focused close and far we need to look at a lens. Scroll through the images and watch the difference from infinity, which is quite close to 3m, to the other end of the scale where it is focussed on 0.5m, which is reasonably close to 0.45m on the right, while 0.7m is quite far to the left. There is a lot of movement at the closer distances to change focus over a distance of a few cm. At the infinity mark we only have a small amount of movement to focus on 3m - which gives an idea why when we focus on something in the distance even the background is in focus.


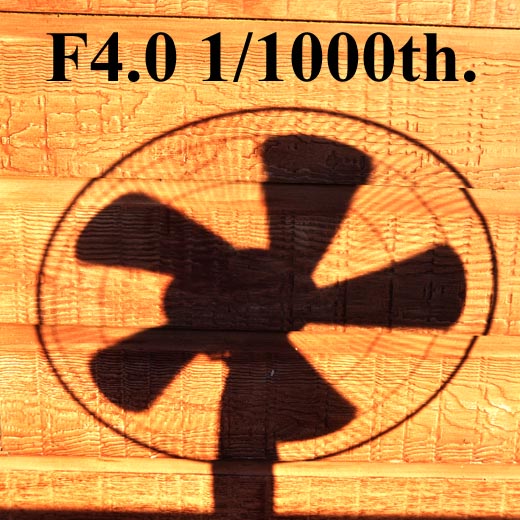
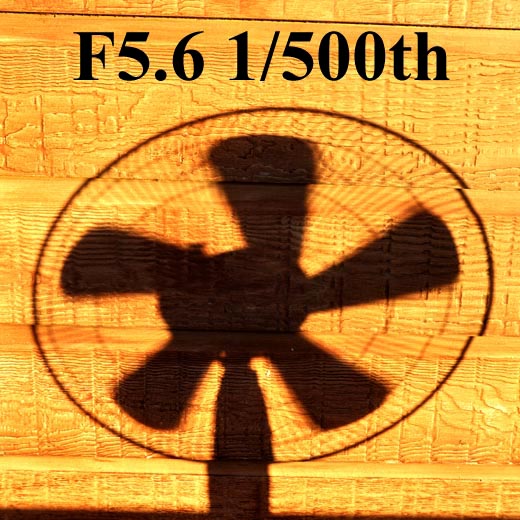
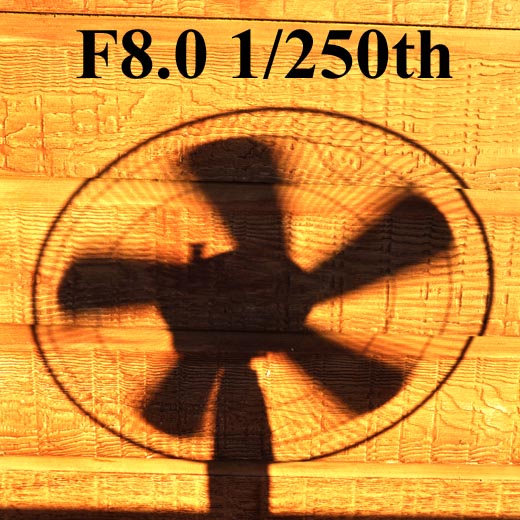
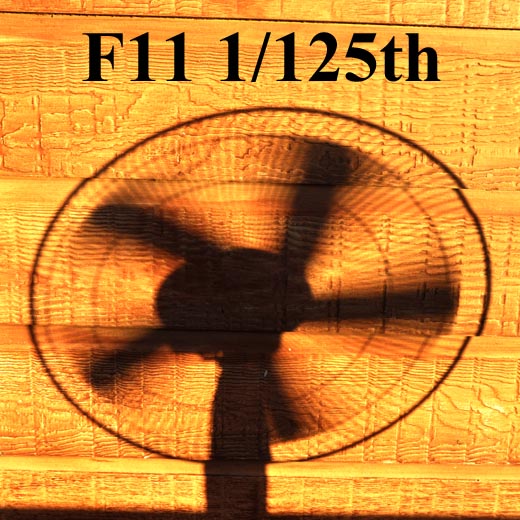
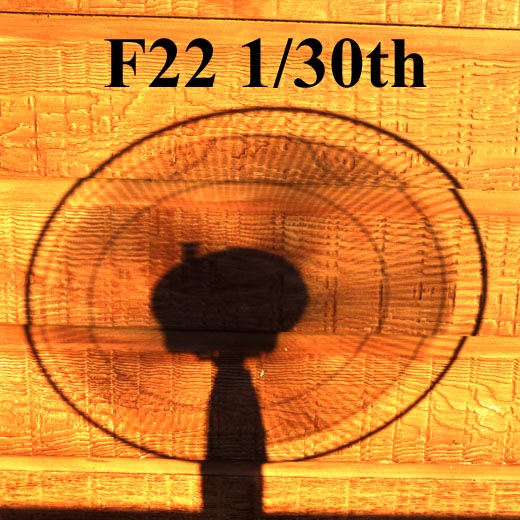
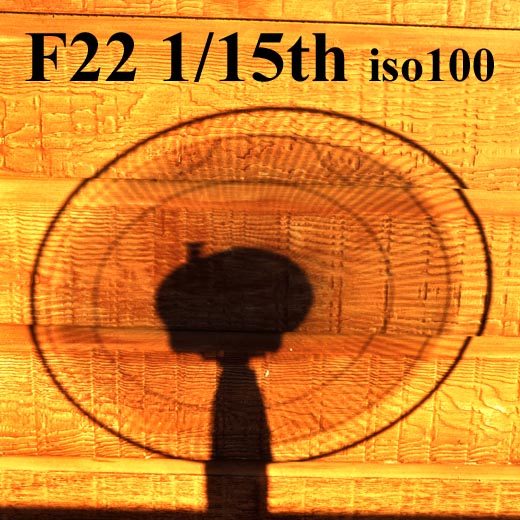
Now let’s move on to Shutter speed. I chose the shadow of a fan spinning on full power for my tests. Set your camera to “S”/”Tv” depending on your camera. On Nikon it’s “S” for “shutter priority” and Canon uses “Time value”. Take pictures at various speeds starting at the fastest shutter speed your camera will allow at its widest aperture in the existing light. It’s best to do this test in sunlight, the more light you have the faster the shutter speed you can use. Pause and think about that, look at the resulting apertures at the various speeds. At f4 we can take the picture at 1/1000th sec. f5.6 is one stop smaller aperture and we get 1/500th sec, which is twice as slow as f4. Each stop that we close the aperture down means having to keep the shutter open twice as long as previously: If we turn the microwave down to half power we need twice as long to cook our meal - if there is less light we therefore have to use wider apertures and slower shutter speeds. A little like having half the electricity, then full power on our microwave [widest aperture] with half the electricity means having to keep the microwave on for twice as long as with a full electricity supply. If the sun were “1000 volts” for our microwave then the window light coming in to your house from the sky is about “20 volts” - you would have to have the microwave on 50X longer to “cook your meal”. Look at these two images, 1/5th for indoors, 50X faster for outdoors.

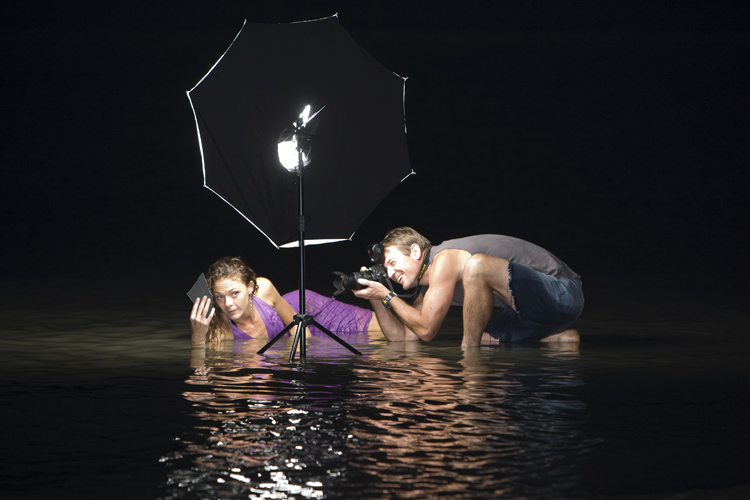
That’s why people like using fast prime lenses like f1.4 when shooting indoors - a “fast” lens means it lets in more like so you can use higher/faster shutter speeds.

Besides Aperture and Shutter speed the other variable for exposure is iso. Let’s compare iso to the volume control on your radio in your car. You have the volume at a low setting [you’re an older person] and everything sounds perfectly clear. As you drive towards the bottom of a valley things start getting quieter, the signal isn’t as strong. You turn up the volume and it gets louder but there is some hissing as well- this is “noise”, you’re trying to amplify a weak signal and in turn you’re also amplifying weak signals that are not part of the music. With a digital camera sensor there are slight electrical signals on the sensor itself as part of the operation of the electronics, if the light is really weak and you amplify it a lot you also amplify these signals.

Iso is something you want to keep as low as possible though cameras these days do pretty well at higher iso’s like 6400 - better to get the shot at iso 6400 than have a blurry image at iso 100 for the sake of “absolute quality”. Now you can either put your camera in Program mode and manually adjust your iso from 100 to its maximum and view the results on your screen or you can go to an excellent site like dpreview and find your camera model and use their interactive widget to view an image at 100% at various iso settings. Have a look at the review on the Nikon D7200, Drag the little square around to various parts of the scene and change the iso setting to see what it does to image quality. Starting from iso 100 to 25600, watch the image quality change - you will most likely see the biggest changes after iso 6400. You can also change the camera it compares with and see how other models compare. You can also change it from jpeg to RAW and see how the files differ and be impressed by the jpeg engine in the camera that processes the image to remove as much noise as possible. Something else to try - set your camera to iso 6400 in program mode and see what aperture and shutter speed it selects. Now set your camera manually to that aperture and shutter speed and take the same image at iso 100. The resulting image will be pretty dark, you are letting in 64X less light than necessary at iso 100 - the image at iso 6400 is also only getting this much light as per your settings - this will give you an idea as to how much amplification is actually taking place when you shoot at iso 6400.